It is more likely than not that over time you will need to change the top tooling on your press brake, perhaps regularly or perhaps just occasionally. However often you need to change your tooling, once it’s done then setting your laser light guards correctly is vital, and here is a walkthrough showing you how to do just that.
Top toolings of course come in several heights and lengths depending on the type of fold you are looking for. Some press brakes have an Allen key system to remove the tooling; some have fast opening systems depending on the make and model.
As you can see in the video, getting the laser guard well out of the way before removing your tooling is a good idea, generally that means lifting it and securing it safely out of harm’s way on the side you intend to work on. When that is done the side fence also needs folding open on the side you wish to remove your tooling from.
So…with the old tooling removed and the new tooling cleaned and fitted by sliding it in, pushing it up and securing it depending on your press brake’s method (Allen key, fast opening/closing system etc,) now it is time to grab your laser alignment tool. These come with every press brake we sell at Selmach and if you haven’t got one, get in touch with us because it is a vital tool for aligning your laser guard.
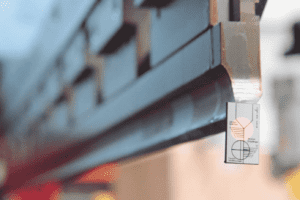
The laser alignment tool attaches to the bottom, or the point of the top tooling magnetically, as shown in our video, with that done turn your machine’s Akas on the control panel to number one and make sure you have a 17mm spanner handy for adjustments. Now you will see that a red heini (a large red dot) will appear somewhere on the face of your alignment tool, but it might not be exactly on the tool’s circular symbol so adjustment will be needed on the linear rail that your laser guide is attached to.
This is where your 17mm spanner will come in handy, for adjusting the bolt on the linear rail and setting the laser guard in just the right place to ensure the heini is exactly over the circular mark on the alignment tool. At this point the left hand column is aligned with the laser tool, now we need to align it with the right hand column.
Firstly, remove the laser alignment tool and keep it in a safe place for next time. We are finished with that for now but they have a tendency to go missing. You will see that on the opposite laser guard there are now two heinis (red dots) shining on to the side. You will also notice the small holes on the side of this opposing laser guard, two together next to a single one alone. Simply adjust the right hand laser guard the same way as with the left one (by adjusting the 17mm bolt) until the two heinis cover all three holes.
It is important to note, in our video and notes here we have demonstrated how to do this from the left-hand side of the press brake, but it is also possible to do this from the right-hand side just as easily as both sides can be opened and both sides can be used to remove the tool, which way you choose is up to you.
Once you have opened the side gates of the machine the gauges on the gate will inform the controller that the machine is unsafe and will put it into slow speed. One thing you must always remember to do when you’ve finished aligning the tool is to turn the Akas position to zero again otherwise the machine will only run on slow speed.
To learn more about our press brake range or how to set the laser light guards on them safely, get in touch today, or give us a call on 01432 346 580
Published 21st October 2016