
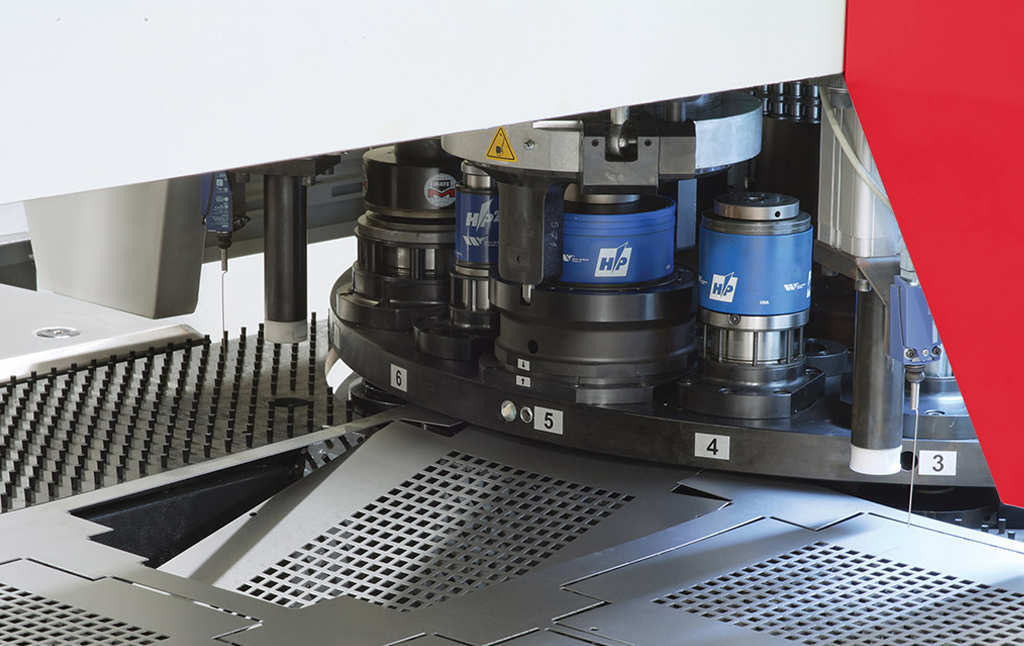
Burrs, loose slugs and sheet marks can turn a productive punching job into a batch of rework. The quickest useful response is not to change several settings at once. It is to identify the pattern of the defect and narrow down where it starts.
This guide focuses on sheet-metal turret punching. Selmach’s GoldCut punch and die guide covers a different tooling context, including steelworkers and punching machines. Tooling arrangements and setup instructions should not be assumed interchangeable between those machines and a turret press.
Make the machine safe before investigating
Stop production if a fault could damage tooling, eject material or create another unsafe condition. Do not reach into the working area, clear slugs or adjust tooling while the machine can move.
Inspection, cleaning and maintenance must follow the manufacturer’s instructions and your site’s safe system of work, including secure isolation and control of stored energy where required. Electrical power is not the only possible energy source: hydraulic pressure, compressed air and mechanical loads may remain. An emergency stop or open guard is not a substitute for the required isolation procedure.
Use competent personnel for the task. Suspected alignment, drive, clamp or safety-system faults should be escalated to qualified support, not corrected by trial-and-error adjustments.
First establish whether the fault follows the tool or the sheet
Keep a defective sample and record the programme revision, material batch, thickness and tool station. Note whether the problem appeared from the first component or developed during the run.
A defect associated with one tool suggests a different starting point from marks appearing across every feature. A problem confined to one area of the sheet may involve support, movement or contact. An issue that first appears after repositioning deserves a review of that operation and its setup.
These observations are clues, not a diagnosis. Their value is that they give the operator, programmer and service engineer the same evidence to work from.
| Observation | Areas for a competent person to review |
| Burrs mainly on one feature | Tool condition, correct die and station setup |
| Quality changes after a material change | Actual grade and thickness, approved tooling and clearance |
| Loose slugs or small impact dents | Slug evacuation and retention, tooling condition and setup |
| Scratches following sheet travel | Sheet surfaces, table cleanliness and contact points |
| Position changes after repositioning | Programme, clamp arrangement and approved repositioning setup |
Burrs need a clearance and condition check
A burr is not automatically evidence that the punch is blunt. Tool wear, inappropriate clearance and setup or material changes can all affect the sheared edge.
Die clearance is the gap between the punch and die cutting edges. It must suit the material, thickness and tooling arrangement. Both insufficient and excessive clearance can cause problems, so reducing the gap is not a universal cure for burrs.
Check the actual material against the job record and confirm that the correct punch and die combination was fitted. The hole edge and slug can help a tooling specialist assess how the material is fracturing. Use the tooling supplier’s recommendations rather than transferring a clearance figure from another material or machine.
If wear is the cause, arrange inspection and sharpening within the tool manufacturer’s limits. Continuing until the edge has deteriorated badly can affect stripping, loading and consistency as well as finish.
Slug pulling can damage the next part of the sheet
The slug is the piece removed when a hole is punched. Slug pulling occurs when it returns with the retracting punch instead of remaining below the sheet in the intended waste path.
A loose slug can mark the surface or be caught by a later operation. Possible contributors include magnetised tooling, the hole geometry, clearance and the interaction between tool setup and lubrication. A sharp tool does not rule the problem out.
Have the tooling and evacuation arrangement reviewed, including any specified slug-retention or ejection features. If the problem began after sharpening, tell the tooling specialist: the post-grinding condition is relevant evidence. Do not improvise penetration, air-pressure or spring adjustments without the correct instructions.
Separate scratches from local tooling marks
Long scratches that follow sheet movement may point towards contamination or contact along the travel path. Local marks around an individual feature may involve the tool, stripper or nearby formed detail.
Once safe access has been established, inspect the sheet faces and accessible support surfaces using the approved cleaning procedure. Loose slugs, swarf and other debris should not be allowed to build up. Check whether the fault is already present on incoming material.
A brush table can be helpful for surface-sensitive work, but it does not guarantee an unmarked component. Material condition, tooling contact and handling remain important. Protective film also needs to be approved for the process; it is not a universal substitute for correcting the contact problem.
Distortion needs a process review
A densely punched sheet may lose flatness even though individual holes appear acceptable. Material condition, the cumulative effect of punching, tool condition and sequence can all be relevant.
Compare the defect with the nest and processing order. Record whether distortion develops around a perforated area or after a particular operation. Ask the programmer and tooling specialist to review the job together rather than applying a blanket change to clearance or speed.
If deburring or finishing is part of the specified production route, assess it on a representative sample. Finishing should not be used to conceal a worsening process fault or damage that makes the component unacceptable.
Record the fix and verify the next batch
After an approved correction, complete the required setup and first-off checks before releasing production. Retain the accepted sample and record what changed, so the next operator does not have to rediscover the solution.
For repeat faults, contact Selmach service support with the machine identification, affected programme and tool station, material details, photographs and a description of when the issue occurs. Clear evidence helps distinguish a tooling question from a machine or programming problem.
If recurring limitations are prompting a machine review, explore the CNC punch press range with your troublesome parts as well as your best-performing jobs. Consistent acceptable output is the target, not simply a high hit count.
Published 1st October 2026